
Modelones Poly Nail Gel Kit | Review & Swatching
*PR*
Polygel nails are a big thing right now. I am obsessed with them but for some reason, never tried. Recently I received a PR package by Modelones and guess what was in there, a poly gel kit!
It was like a sign for me to try them finally and shed whatever fear I have for using them. So this blog includes a review of all the products in the kit and the experience of a first-time user. Let's get started!
If you are a first-time poly gel user, do read till the end for extra tips and a tutorial with Modelones poly gel kit. You will love it!
Packaging

Packaging is pretty good. This kit box was placed inside a cardboard box with bubble wrap on it. the box looks nice and can be used as a gift box if you need a nice gift. It has a matte black design, minimal and classy. All the products were placed inside wrapped in bubble wraps.
Cost
$49 but you can get it for $45.99 ( Sale is live on the website)
Buy it from here: https://modelones.com/collections/poly-nail-gel-kit-1/products/10pcs-poly-nail-gel-kit-1

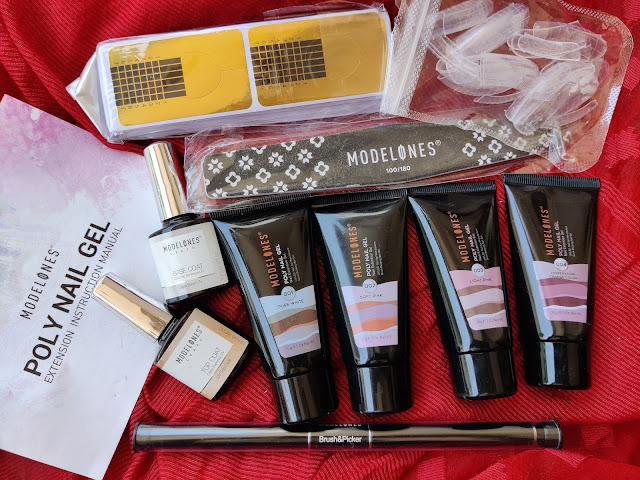
Poly Nail Gel Kit contains
1 * Temperature Color Changing Poly Nail Gel (30g)
1 * Base coat (10ml)
1 * Top coat (10ml)
1 * Nail 100/180 File
1 * Dual-Ended Nail Brush and Spatula
36 * Dual Forms (12Size*3PCS Each)
100 * Nail Paper Tray
1 * Instruction Manual

Top & Base Coat

Modelones have included Top and base coat, 10ml each in the kit. You have to cure them both simultaneously. If you do not have 70% isopropyl alcohol or slip solution, use the base coat as slip solution.
Dual forms & Nail Paper tray

This kit has 36 Dual Forms (12Size*3PCS Each) and 100 Nail Paper Trays. The quality of dual forms is good and it pops up easily once the nails are done. Paper trays also look nice, but I will comment after using them.
Nail 100/180 File

100/180 file is good for shaping and prepping your poly gel nails. The quality of this file is nice and I love the Louis Vuitton kinda inspired design on it.
Dual-Ended Nail Brush and Spatula

A brush and spatula are quite important tools and I love how this one is dual-ended. It looks like a pen and is super easy to use. The quality is also pretty nice. The brush kinda loses its shape when you dip it in slip solution, but works nicely.

Poly Nail Gel Set of Four

This kit contains 4 poly gels, each having 30 grams of quantity. There is white, soft pink, light pink, and thermal color-changing. The tubes are soft and it is easy to take out the product in the right quantity.
White

A milky white poly gel, perfect for those who want to have them semi-permanently and use other polishes on top.
Soft Pink

A milky pink shade. I did my nails using this one, you can see it at the end.
Light Pink

This one is a slightly gelish kinda pink shade. slightly translucent.
Colour Changing poly gel

This one is the most special poly gel tube in the kit. It is a thermal polish that changes color according to temperature. It will turn a slightly pinkish purple shade when it comes in contained with heat.
How to use it?
Step 2: Apply a thin layer of base coat, and cure it under LED lamp (It is supposed to be sticky! No need for wipe)
Step 3: Select a suitable shape & size false nail tip for each nail.
Step 4: Put the hard builder gel into false nail tips by nail are pen. Press the hard builder gel to level in false nail tip. Cure under LED lamp.
Step 5: Remove the false nail.
Step 6: Trim, shape, buff, and polish your nails for the desired look. Finish off with top coat and cure under LED lamp.
Apart from this, all the instructions are also mentioned in the instruction guide that comes along. I will suggest that you keep it with you and read it before doing it. The timing of curing each product on different steps is given over there.
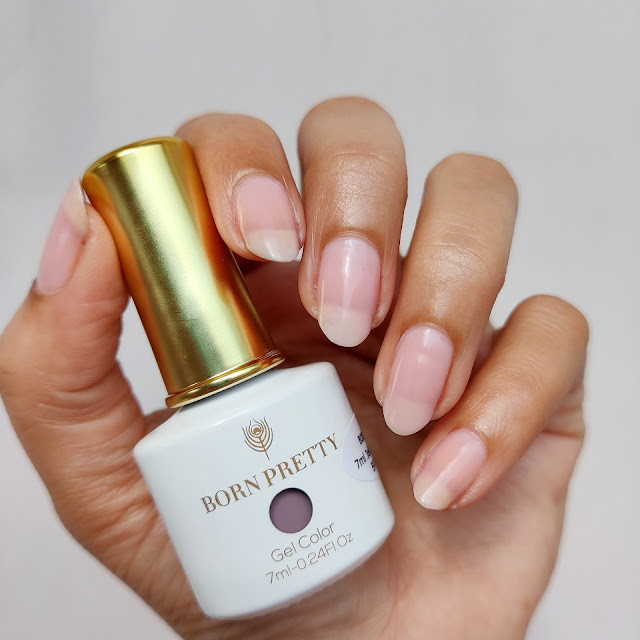
My finished nails using the soft pink poly nail gel

My Experience with Modelones Poly Nail Gel Kit

Let me tell you one thing, this was my first experience with poly gel, any kind of poly gel. So when I received it in PR, I was pretty excited and kinda scared to use it. I am aware of what and how it is done but never used it. Thankfully this kit had everything that one needs to do their poly gel nails. It is an 11 piece kit, containing almost everything one needs. Only the UV lamp and nail tip clamps were not there in the kit (I already had them). You need these things as well for doing your nails.
The kit also did not have a slip solution, the base coat they had included in the kit can be used as a slip solution. All the products were pretty easy to use and everything was mentioned in detail in the instruction guide. It took me about 30 minutes to do all my nails on one hand and this was my first time doing them.
You can understand how easy and well-maintained this kit is, especially for a first-timer. The kit has dual nail forms as well as paper trays, so you can play with them for creating different nails. It had a strong smell, all the products as most of the gel products contains. Not very overpowering, but I will suggest that you do it in a well-ventilated room.
For the poly gel, you need a very little quantity to craft each nail. The slip solution can make the gel rather a slipper so if it is not sticking on your nail, let it dry up a little. Once it is done, shape your nails using the filer from the kit. Do it in one-sided motion, gently. You do not want to damage your nail beds.
Modelones is known for its quality gel products and I loved this kit. My next set will be the colour changing thermal poly gel from this kit.

If you are new to poly gel, this kit is a must for you. It is helpful in many ways. This kit contains everything that you need, apart from a UV lamp. Everything is laid out in the instruction manual in detail and products are easy to work with. This was my very first poly gel nail creation and I think I did a good job. For rest, if you need any help or suggestion regarding poly gel, I am here to answer all your questions.
Lots of Love!!!
XOXO

Comments
Post a Comment